Publishing a Package on Opam
Last Updated: 02, October 2020 at 13:47:55
Platform tools: Dune-releaseopam-publishDune
Overview
Some prerequisites -- there are lots of ways to publish packages. This workflow will be using the git version control system along with a workflow for dune users and a workflow for non-dune users.
Part of the appeal of open-source software is the ability to share the code with other users. This could be as a library, a command-line tool for an end user or something completely different. Ultimately the code needs to be put somewhere and a central source of where to find it needs to be updated. This workflow focuses on using opam to do just that.
Opam is a package manager for OCaml. If you are reading this workflow then chances are you have interacted with the opam-client probably to install packages like dune or OCamlFormat. If you are looking to publish your code then you should also have an opam file for your project.
Opam Internals
Before diving into the tools for publishing your code, it is important to understand how the opam ecosystem works. One of the key concepts to understand is the idea of an opam repository. This is a structured collection of opam files indicating where to find different versions of packages and how to build and install them. The main repository can be found on Github and here is an example of a package: ocamlformat.0.15.0.
In order to publish to the opam repository you need to tag your project - this means adding a tag to indicate that a particular commit represents your piece of software at a particular version. The OCaml community strive to use semantic versioning.
Tagging is used in order to create a release of your package. A release is an archive of the source code. The most common place to do this is on Github. You specify where a package is released to in the url field of the opam-repository opam files (not in the source code version as they change because of the checksum that is also added).
How you tag, produce the archive, generate the slightly different opam file and create a pull-request to the opam-repository differs depending on the tool you use. Skip ahead to the dune-release workflow or the opam-publish workflow if you don't want some information on the continuous integration opam offers.
Opam Continuous Integration
Whenever you make a pull-request to add your latest package information to the central opam repository a series of continuous integration tools are run to check your code builds, installs and how it impacts reverse dependencies (those tools that depend on your package). TravisCI is used to check if your new release will install on a variety of platforms including MacOS, FreeBSD and arm64. Camelus reports on a variety of problems to help ease the burden on maintainers like linting the file and checking what new packages have become available (or not) as a result of the PR.
Finally, a tool called DataKit-CI does the heavy lifting and checks more platforms and the reverse dependencies. For those interested, there is a new CI tool based on ocurrent pipelines coming soon.
Recommended Workflow
For Dune Users
Dune-release is the recommended tool for people using dune, opam and Github. Provided you follow some conventions, most of the hard work is taken care of by dune-release. To install it, simply run opam install dune-release.
A good first step is to run dune-release lint at the root of your project. This will check for the conventions that dune-release is expecting and report back on any errors.
$ dune build
$ dune-release lint
[ OK ] File README is present.
[FAIL] File LICENSE is missing.
[FAIL] File CHANGES is missing.
[ OK ] File opam is present.
[ OK ] lint opam file lib.opam.
[ OK ] opam field description is present
[ OK ] opam fields homepage and dev-repo can be parsed by dune-release
[ OK ] Skipping doc field linting, no doc field found
One of the more important documents is the CHANGES file. This specifies what parts of codebase have changed (new functionality, bug fixes etc.) since the last version. Not only is this important for users of your package, the dune-release tool can use it to automatically tag the latest commit with the correct version. The Irmin CHANGES file is a good example you can base your own file off of.
Licensing your software is also important, but not strictly necessary. The open source initiative details their approved list. Another fairly common license is ISC.
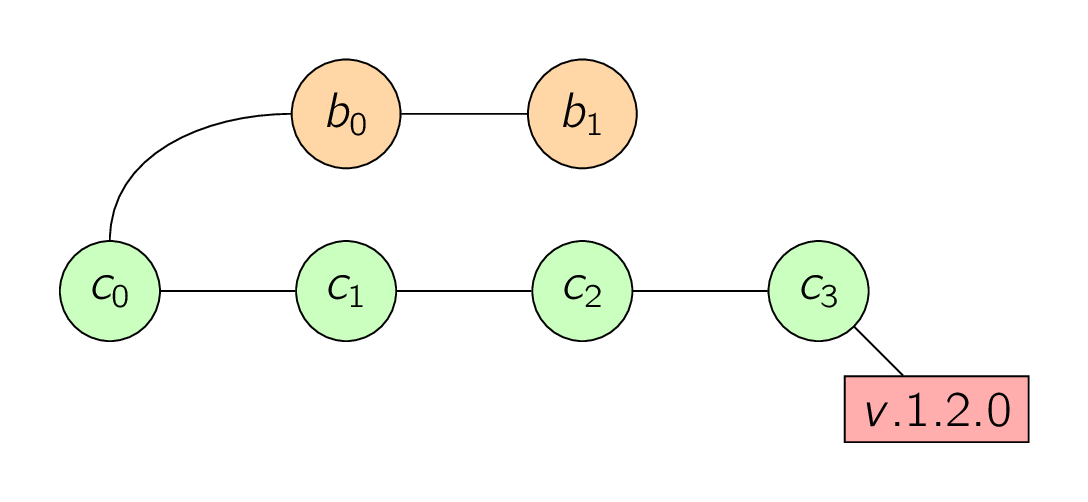
Once dune-release lint is happy and you are ready to release your software, you need to tag it. This is as simple as running dune-release tag. As mentioned before, with a correctly formatted CHANGES file this will be automatic. Otherwise, dune-release will not find the change log and you need to manually specify the version number (e.g. dune-release tag v.1.2.0). You can use the -d flag to delete tags if you want to change something.
The next steps generate the distribution archive, publish documentation, generate the opam package and submit a PR to the opam repository. This is the most common workflow with dune-release and can all be invoked with just dune-release. Under the hood this makes a call to dune-release bistro. If you want to understand each individual command called, then read on.
The next step is to generate the archive -- this can be done by running dune-release distrib. Finally you can publish the release of your code to Github with dune-release publish distrib and if you want to push your documentation to Github pages then run dune-release publish doc.
Now with your documentation and archive somewhere accessible, the last step is to generate the opam repository specific opam file and make a pull request to the central opam repository. To generate an opam file run dune-release opam pkg and to make the pull request dune-release opam submit.
Note that all the commands have a very thorough and instructive --help page to explain in detail what they do. In summary, if everything is set up correctly you can run.
$ dune-release lint
# Update CHANGES with new release version
$ dune-release tag
# You can run the next commands with just dune-release
$ dune-release distrib
$ dune-release publish
$ dune-release opam pkg
$ dune-release opam submit
There is also this helpful graphic to remind you of the process.
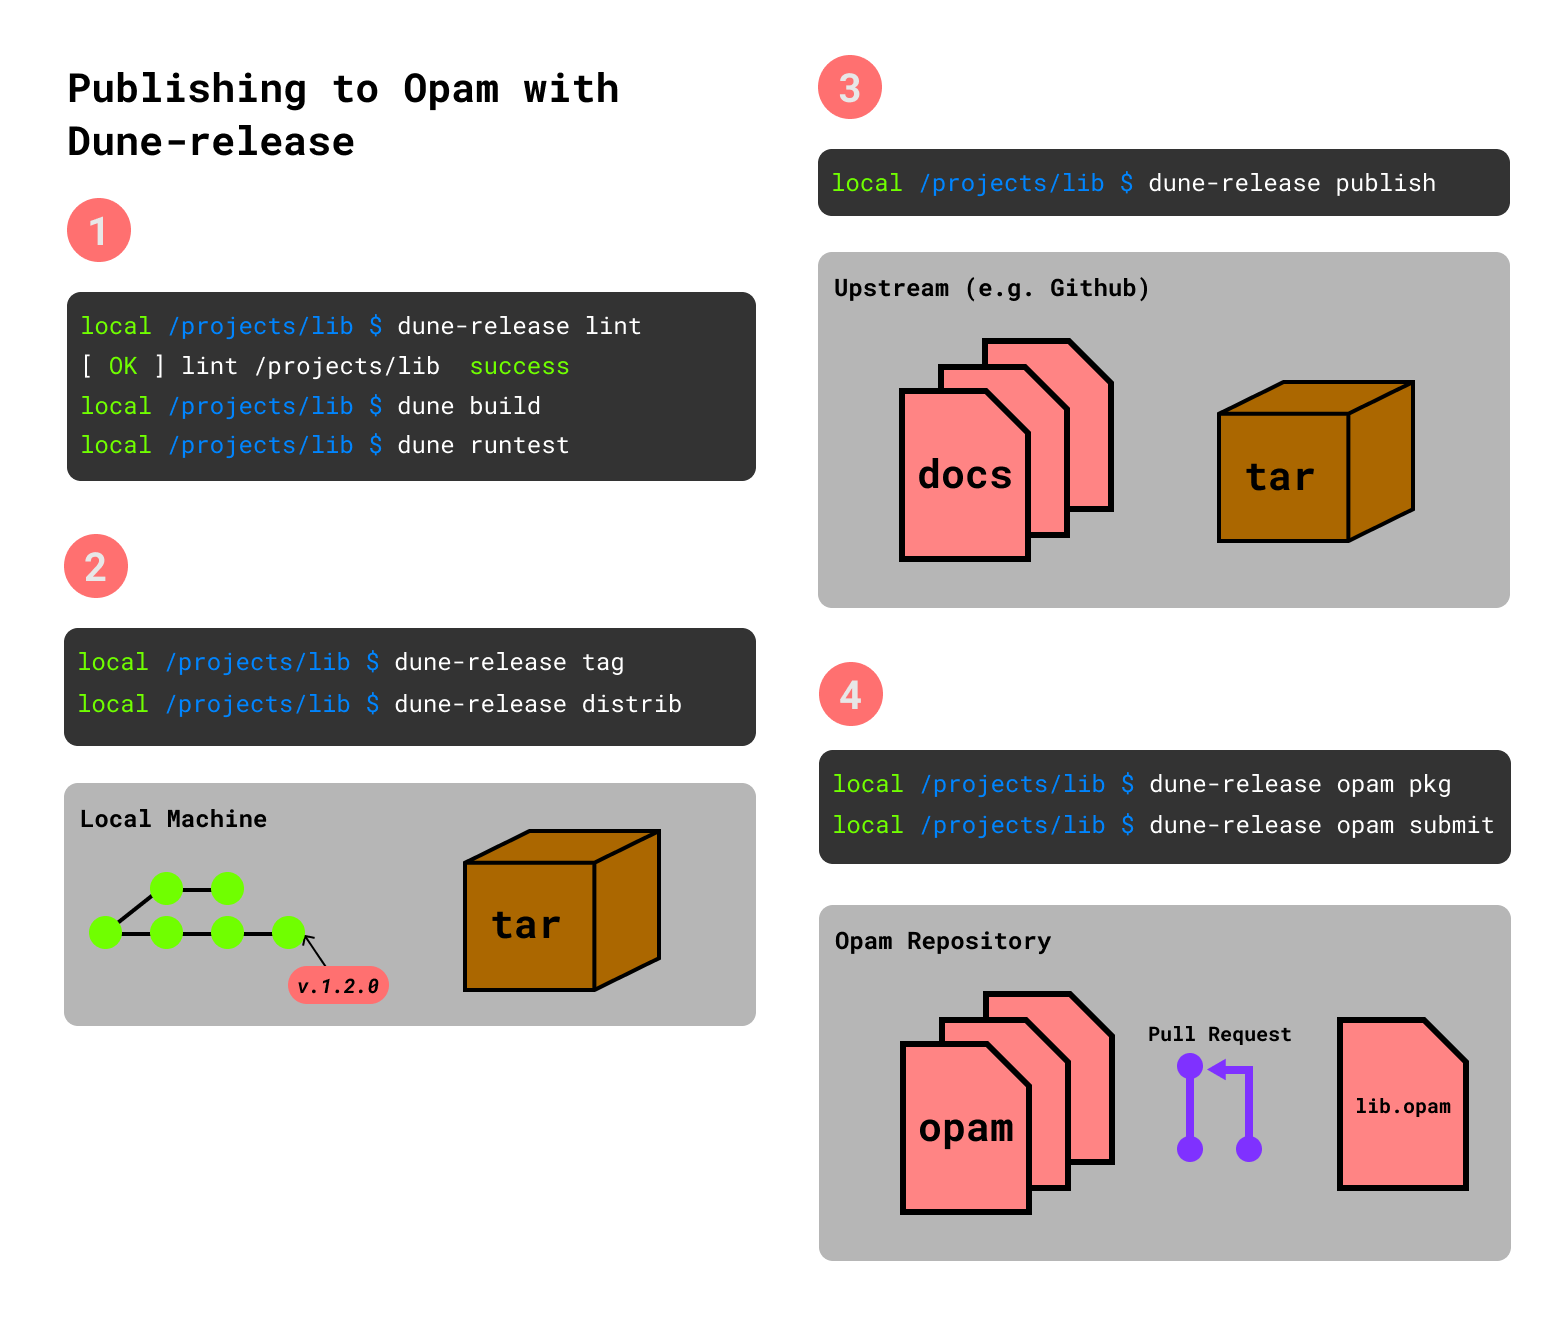
For Everyone Else
If you are not using dune and Github then the easiest way to publish your code is using opam-publish. The idea is very similar in terms of tagging your git repository, generating an archive and making a pull request to the central opam repository.
The first thing you should probably try is opam install . from your repository. This is to ensure you have a well formatted opam file. If this installs successfully then you are good to move on.
In your version control system (VCS) you need to tag a commit with a version ready for release. The command for git is:
# Tag the commit with a version number
$ git tag -a v.1.2.0
# Push upstream -- this generates an archive on Github
$ git push origin v1.2.0
From here the opam publish command can take over and make the pull request for you. Note that the first time you use it you will have to provide credentials in order to integrate it with the code hosting service you use.
# For Github users
$ opam publish
# For non-Github users
$ opam publish <url-of-archive> .
Opam-publish doesn't have the same documentation capabilities as dune-release so be sure the read up on managing documentation for your project.